Pass Your Microsoft Certified: Azure Developer Associate Certification Easy!
Microsoft Certified: Azure Developer Associate Certification Exams Questions & Answers, Accurate & Verified By IT Experts
Instant Download, Free Fast Updates, 99.6% Pass Rate.

$69.99
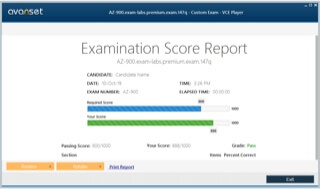
Microsoft Certified: Azure Developer Associate Certification Exams Screenshots
Download Free Microsoft Certified: Azure Developer Associate Practice Test Questions VCE Files
| Exam | Title | Files |
|---|---|---|
Exam AZ-204 |
Title Developing Solutions for Microsoft Azure |
Files 11 |
Microsoft Certified: Azure Developer Associate Certification Exam Dumps & Practice Test Questions
Prepare with top-notch Microsoft Certified: Azure Developer Associate certification practice test questions and answers, vce exam dumps, study guide, video training course from ExamCollection. All Microsoft Certified: Azure Developer Associate certification exam dumps & practice test questions and answers are uploaded by users who have passed the exam themselves and formatted them into vce file format.
Understanding the Microsoft Certified: Azure Developer Associate Certification
The Microsoft Certified: Azure Developer Associate certification is one of the most respected credentials in the cloud development space. It is designed for developers who want to validate their skills in building, deploying, and maintaining applications on Microsoft Azure. As organizations increasingly move their infrastructure and services to the cloud, having proven expertise in Azure development can significantly enhance career opportunities and credibility in the industry.
This certification focuses on practical, hands-on knowledge that allows developers to create scalable, secure, and reliable cloud solutions. It is ideal for professionals who want to demonstrate their ability to implement real-world Azure solutions, integrate cloud services, and adopt best practices for application development in the Azure ecosystem.
Who Should Pursue the Azure Developer Associate Certification
This certification is targeted at developers, cloud engineers, and IT professionals who are actively involved in designing and implementing cloud solutions. Individuals who benefit most from this certification typically have experience with cloud-based applications and a solid understanding of software development practices.
Candidates should have familiarity with at least one programming language such as C#, Python, Java, or JavaScript. Additionally, understanding core Azure services such as compute, storage, and security is highly recommended. Professionals pursuing this certification are often seeking roles that involve cloud application development, integration with Azure services, and continuous deployment strategies.
Exam Overview and Structure
To earn the Azure Developer Associate certification, candidates must pass the AZ-204 exam: Developing Solutions for Microsoft Azure. This exam is designed to assess both knowledge and practical skills in developing cloud solutions. It covers a wide range of topics, from deploying Azure compute solutions to implementing security features and optimizing performance.
The AZ-204 exam evaluates a candidate's ability to:
Develop Azure compute solutions, including App Services, Azure Functions, and containerized applications.
Implement Azure storage solutions, including relational and non-relational databases, blob storage, and data access optimization.
Integrate security measures and authentication mechanisms into cloud applications.
Connect and consume Azure services, APIs, and third-party resources.
Monitor, troubleshoot, and optimize cloud-based applications.
Implement DevOps practices for continuous integration and continuous deployment.
The exam is scenario-based, meaning that candidates will be tested on real-world applications and problem-solving skills. This ensures that certified professionals are ready to handle the practical challenges of Azure development in a business environment.
Prerequisites and Recommended Knowledge
While there are no mandatory prerequisites for the Azure Developer Associate certification, Microsoft recommends that candidates have some professional experience in cloud development. A background in software development, familiarity with cloud computing concepts, and experience with Azure services are highly beneficial.
Recommended knowledge and skills include:
1 to 2 years of professional development experience with cloud-based applications.
Understanding of Azure architecture and common design patterns.
Familiarity with core Azure services such as compute, networking, and storage.
Experience with REST APIs, JSON, and application integration techniques.
Basic knowledge of authentication and authorization methods in cloud applications.
Having these foundational skills ensures that candidates can fully understand the exam objectives and apply their knowledge to real-world scenarios.
Key Skills Measured by the Certification
The Azure Developer Associate certification validates a wide range of skills necessary for building modern cloud applications. These skills are directly aligned with the needs of organizations that deploy solutions on Azure and emphasize both technical competence and best practices.
Developing Azure Compute Solutions
Certified developers are expected to design, implement, and manage Azure compute services such as Azure App Services, Azure Functions, and Azure Kubernetes Service. This includes creating scalable solutions, managing performance, and ensuring high availability. Understanding how to deploy containerized applications and serverless functions is critical for modern cloud development.
Implementing Azure Storage Solutions
Data management is a core aspect of cloud applications. Candidates must know how to implement Azure storage solutions, including relational databases like Azure SQL Database, non-relational databases such as Cosmos DB, and Blob Storage. They should understand data access patterns, replication strategies, and backup solutions. This ensures that applications can handle large volumes of data efficiently and securely.
Integrating Security and Authentication
Security is a priority in cloud environments. Azure Developer Associate candidates must be able to integrate authentication and authorization mechanisms into applications, including Azure Active Directory, OAuth, and role-based access control. They should also be able to implement data protection measures, such as encryption and key management, to safeguard sensitive information.
Connecting and Consuming Azure Services
Modern applications often rely on multiple services and APIs. Certified developers must know how to integrate Azure services and consume APIs from both Azure and third-party providers. This includes designing service-to-service communication, handling data transformations, and ensuring that integrations are secure and reliable.
Monitoring, Troubleshooting, and Optimizing Applications
Azure provides a range of tools for monitoring application performance, identifying bottlenecks, and diagnosing errors. Candidates should be familiar with Azure Monitor, Application Insights, and Log Analytics. They must be able to optimize applications for performance, cost-efficiency, and reliability, ensuring that cloud solutions meet business requirements.
Implementing DevOps Practices
Automation and continuous integration/continuous deployment (CI/CD) are critical in modern development workflows. Azure Developer Associate candidates should understand how to implement DevOps practices using Azure DevOps or GitHub Actions. This includes setting up pipelines, automating deployments, managing infrastructure as code, and monitoring application lifecycles.
Benefits of Earning the Certification
Achieving the Azure Developer Associate certification provides significant career advantages. It is a recognized validation of expertise in Azure development and demonstrates practical skills that employers value.
Career Advancement Opportunities
Certified professionals are often considered for roles such as Azure Developer, Cloud Solutions Developer, DevOps Engineer, and Application Architect. These roles are in high demand as more organizations migrate workloads to Azure.
Industry Recognition
The certification enhances credibility with employers, colleagues, and clients. It shows that the professional possesses up-to-date knowledge and can apply it effectively to real-world cloud solutions.
Higher Earning Potential
Azure-certified developers typically command higher salaries due to their specialized skills and proven expertise. Organizations are willing to invest in professionals who can deliver secure, scalable, and reliable cloud applications.
Practical Experience and Hands-On Knowledge
Preparing for the certification provides hands-on experience with Azure services, enabling professionals to implement and manage real-world applications. This experience is valuable not only for passing the exam but also for performing effectively in day-to-day roles.
Networking and Community Engagement
Certification connects professionals with a global network of Azure experts and communities. Engaging with peers allows for knowledge sharing, professional growth, and access to insights about emerging technologies and best practices.
Preparing for the AZ-204 Exam
Preparation for the AZ-204 exam should focus on practical experience, theoretical knowledge, and familiarity with Microsoft’s recommended learning paths. Candidates are encouraged to combine online training, hands-on labs, and practice exams to ensure readiness.
Microsoft Learn Modules
Microsoft provides a comprehensive set of learning modules tailored to AZ-204 objectives. These modules cover topics such as developing Azure compute solutions, implementing storage, integrating security, and monitoring applications.
Instructor-Led Training
For more structured learning, instructor-led courses are available both online and in-person. These courses provide guided instruction, hands-on labs, and opportunities to interact with experienced trainers.
Practice Exams
Simulated exams help candidates evaluate their knowledge and identify areas for improvement. Practicing with real-world scenarios enhances confidence and reduces exam-day anxiety.
Community and Forums
Engaging with online communities, discussion forums, and study groups allows candidates to share insights, ask questions, and learn from peers. These platforms can provide valuable tips and resources not found in official materials.
Future Prospects for Azure Developers
As cloud adoption continues to accelerate, the demand for Azure developers remains strong. Organizations require professionals who can design, deploy, and maintain cloud applications efficiently. Azure Developer Associate certification equips candidates with the skills necessary to meet these demands and stay competitive in the technology job market.
Certified professionals can work across industries including finance, healthcare, retail, and government, developing applications that improve business processes, enhance user experiences, and drive innovation. The certification also opens doors to advanced certifications, leadership roles, and specialization in areas such as AI, data engineering, and DevOps.
The Microsoft Certified: Azure Developer Associate certification is a powerful credential for developers seeking to advance their careers in cloud computing. It validates a broad range of skills, from developing compute and storage solutions to integrating security, optimizing applications, and implementing DevOps practices. By earning this certification, professionals gain practical experience, industry recognition, and access to exciting career opportunities in a rapidly growing field.
With the right preparation, hands-on practice, and understanding of Azure services, aspiring developers can confidently achieve this certification and position themselves as valuable contributors to any organization leveraging the power of Microsoft Azure.
AZ-204 Exam Guide: Developing Solutions for Microsoft Azure
The AZ-204 exam, Developing Solutions for Microsoft Azure, is the core requirement for earning the Microsoft Certified: Azure Developer Associate credential. It is a comprehensive test designed to evaluate practical skills and knowledge necessary for building, deploying, and maintaining applications on the Azure platform. Passing this exam not only demonstrates your technical expertise but also positions you as a capable cloud developer in a rapidly growing market.
Understanding the exam structure, objectives, and preparation strategies is critical to achieving success. This guide provides a detailed overview to help candidates navigate the AZ-204 exam effectively.
Overview of the AZ-204 Exam
The AZ-204 exam assesses a candidate’s ability to develop Azure solutions across a variety of domains, including compute, storage, security, integration, monitoring, and deployment. The exam is scenario-based, testing real-world problem-solving abilities rather than just theoretical knowledge.
Key details of the exam include:
Exam Code: AZ-204
Exam Duration: Approximately 150 minutes
Question Types: Multiple choice, multiple response, case studies, drag and drop, and scenario-based tasks
Passing Score: 700 out of 1000
Language: Available in multiple languages including English
The exam measures skills across five major domains: developing Azure compute solutions, implementing Azure storage, securing cloud applications, monitoring and optimizing solutions, and integrating Azure services.
Exam Objectives and Domains
Microsoft structures the AZ-204 exam objectives into clear skill domains. Understanding these domains and their weightage is crucial for targeted preparation.
Developing Azure Compute Solutions
This domain focuses on creating and managing cloud-based compute services. Candidates should be proficient in:
Implementing Azure App Service web apps and API apps
Creating Azure Functions and serverless solutions
Managing containers using Azure Kubernetes Service and Azure Container Instances
Configuring application scaling and high availability
Implementing background processing with Azure Logic Apps or WebJobs
Understanding compute solutions allows developers to create scalable applications that handle varying workloads efficiently.
Implementing Azure Storage Solutions
Managing data is a critical part of cloud development. Candidates must demonstrate the ability to:
Implement Azure Cosmos DB for NoSQL workloads
Configure Azure SQL Database for relational storage
Use Azure Blob Storage and Queue Storage for large-scale data handling
Optimize storage performance and implement caching strategies
Configure data replication, backup, and disaster recovery
Proficiency in storage solutions ensures applications are reliable, responsive, and capable of managing large datasets securely.
Securing Cloud Applications
Security is a fundamental aspect of cloud development. The exam evaluates a candidate’s knowledge of:
Implementing authentication and authorization using Azure Active Directory
Integrating role-based access control (RBAC)
Managing application secrets with Azure Key Vault
Implementing secure data storage and encryption techniques
Ensuring compliance with security policies and standards
Security skills are essential to protect sensitive data and maintain the trust of users and organizations.
Monitoring, Troubleshooting, and Optimizing Solutions
Azure provides extensive monitoring and diagnostic tools. Candidates are expected to demonstrate the ability to:
Use Azure Monitor, Application Insights, and Log Analytics to track application performance
Detect and troubleshoot application errors and bottlenecks
Optimize applications for cost, performance, and scalability
Implement alerts and automated responses for system issues
Conduct root cause analysis and continuous improvement
Monitoring and optimization skills ensure applications perform reliably and meet business requirements.
Integrating Azure Services and APIs
Modern applications often rely on multiple services and APIs. Candidates should know how to:
Connect and consume Azure services such as Event Grid, Service Bus, and Event Hubs
Integrate REST APIs and third-party APIs
Implement message-based communication between applications
Handle data transformations and service orchestration
Use serverless integrations for lightweight, event-driven workflows
Integration skills allow developers to build cohesive applications that interact seamlessly with cloud services and external systems.
Preparation Strategies for the AZ-204 Exam
Effective preparation for the AZ-204 exam involves a combination of hands-on practice, theoretical study, and understanding of practical scenarios. A structured approach improves retention and ensures candidates are ready for real-world problem solving.
Hands-On Experience
Practical experience with Azure services is essential. Candidates should spend time building sample applications, deploying resources, and experimenting with different service configurations. Hands-on labs help solidify understanding and prepare candidates for scenario-based questions on the exam.
Recommended practice activities include:
Creating web apps and APIs using Azure App Service
Implementing serverless workflows with Azure Functions and Logic Apps
Configuring databases and storage accounts, including Cosmos DB and Blob Storage
Setting up monitoring and logging using Azure Monitor and Application Insights
Automating deployments with Azure DevOps pipelines
Microsoft Learn Modules
Microsoft Learn provides structured learning paths aligned with the AZ-204 exam objectives. These modules offer guided exercises, tutorials, and assessments that help reinforce understanding of key concepts.
Candidates should focus on modules related to:
Developing cloud applications with compute services
Implementing storage solutions and optimizing performance
Integrating security and authentication mechanisms
Connecting Azure services and APIs
Monitoring and troubleshooting applications
Using Microsoft Learn ensures that candidates are studying content directly aligned with the exam.
Instructor-Led Training
For those who prefer guided learning, instructor-led courses are available. These courses provide detailed explanations, hands-on labs, and opportunities to interact with experienced trainers. They can help clarify complex topics and provide strategies for tackling scenario-based exam questions.
Practice Exams and Mock Tests
Simulated exams help candidates evaluate readiness and identify knowledge gaps. Practice exams allow candidates to experience the format and timing of the actual test, helping reduce exam-day anxiety. Reviewing incorrect answers and understanding the reasoning behind correct solutions is critical to improving performance.
Study Groups and Online Communities
Engaging with study groups, forums, and online communities allows candidates to share insights, ask questions, and gain different perspectives. Platforms such as the Microsoft Tech Community and LinkedIn groups provide access to valuable resources and tips from certified professionals.
Exam Day Tips and Best Practices
Preparation goes beyond studying. Understanding how to approach the exam itself can make a significant difference in performance.
Read each question carefully: Many questions are scenario-based, requiring a thorough understanding of the context before choosing an answer.
Manage your time: Allocate time according to question difficulty and ensure you have enough time to review answers.
Focus on scenarios: Scenario-based questions test practical skills. Think about how services interact in real-world applications.
Use elimination: If unsure of an answer, eliminate obviously incorrect options to improve the chances of selecting the correct answer.
Review flagged questions: Use the exam review feature to revisit difficult questions before submitting.
Common Challenges and How to Overcome Them
Candidates often face challenges such as the breadth of topics, scenario complexity, and time constraints. Addressing these challenges requires strategic preparation:
Breadth of Topics: Focus on hands-on experience and Microsoft Learn modules to cover all domains comprehensively.
Scenario Complexity: Practice real-world scenarios and case studies to understand how Azure services interact.
Time Management: Take timed practice exams to build pacing and reduce pressure during the actual test.
Keeping Updated: Azure services evolve rapidly. Follow Microsoft announcements and service updates to ensure knowledge is current.
Post-Certification Opportunities
After passing the AZ-204 exam and earning the Azure Developer Associate certification, professionals gain access to a wide range of career opportunities:
Azure Developer: Build and deploy applications on Azure, implementing compute, storage, and security solutions.
Cloud Solutions Developer: Design integrated solutions that leverage multiple Azure services and third-party APIs.
DevOps Engineer: Implement CI/CD pipelines, automate deployments, and monitor application performance.
Application Architect: Plan and design scalable, secure, and resilient cloud applications.
Certification also serves as a foundation for pursuing advanced Microsoft certifications, such as the Azure Solutions Architect Expert or Azure DevOps Engineer Expert credentials.
The AZ-204 exam is a comprehensive assessment that validates a professional's ability to develop and maintain applications on Microsoft Azure. Success requires a balance of hands-on experience, theoretical knowledge, and understanding of real-world application scenarios.
By following structured learning paths, engaging in practical exercises, and leveraging community resources, candidates can effectively prepare for the exam and position themselves for rewarding careers in cloud development. Achieving the Azure Developer Associate certification demonstrates expertise, enhances credibility, and opens doors to high-demand roles in a cloud-first world.
Core Skills and Hands-On Practices for Azure Developers
Becoming a Microsoft Certified: Azure Developer Associate requires more than just passing the exam. It demands a thorough understanding of core Azure services, development practices, and hands-on experience with cloud solutions. Developing these skills ensures that candidates can design, implement, and maintain high-performing applications in a cloud environment while meeting organizational and industry standards.
This guide explores the essential skills for Azure developers, practical exercises to reinforce learning, and strategies for applying these skills in real-world scenarios.
Understanding Azure Compute Services
One of the foundational skills for Azure developers is mastering compute services. Compute services allow developers to deploy, run, and scale applications efficiently in the cloud.
Azure App Services
Azure App Services is a fully managed platform for building web applications, RESTful APIs, and mobile backends. Developers should know how to:
Create and deploy web apps using Azure App Service
Configure deployment slots for testing and staging
Enable scaling to handle variable workloads
Integrate authentication and authorization features
Hands-on practice includes creating a simple web application, deploying it to App Service, and configuring scaling rules based on traffic patterns.
Azure Functions
Azure Functions is a serverless compute service that enables event-driven programming. Key skills include:
Creating functions triggered by HTTP requests, timers, or events
Using bindings to integrate with storage, databases, and other services
Implementing error handling and logging
Optimizing execution for performance and cost
Practical exercises involve creating a function that processes data from a storage account or responds to an event in an Event Hub.
Containers and Kubernetes
Containerization is essential for modern cloud development. Developers should understand:
Deploying containerized applications using Azure Container Instances
Managing container orchestration with Azure Kubernetes Service (AKS)
Scaling and monitoring containers for reliability and performance
Hands-on exercises include deploying a Docker container to Azure, creating an AKS cluster, and implementing basic monitoring.
Mastering Azure Storage Solutions
Data management is a core responsibility for Azure developers. Understanding storage solutions and their best practices ensures applications are reliable, scalable, and secure.
Azure SQL Database
Azure SQL Database is a fully managed relational database service. Developers should know how to:
Create and configure SQL databases
Implement indexing and query optimization
Handle backups, replication, and failover
Secure data with encryption and access control
Practical exercises include creating a database, writing queries, and implementing backup strategies.
Azure Cosmos DB
Azure Cosmos DB is a globally distributed, multi-model NoSQL database. Skills include:
Creating and configuring Cosmos DB containers
Understanding partitioning and throughput allocation
Implementing change feed and data replication
Integrating with serverless applications
Hands-on practice involves designing a sample application that reads and writes data to Cosmos DB and scales dynamically.
Blob and Queue Storage
Blob and Queue Storage provide object and message storage solutions. Developers should know how to:
Store and retrieve large files efficiently
Use queues for asynchronous processing
Implement data lifecycle management and retention policies
Secure storage with shared access signatures and encryption
Exercises include uploading files to Blob Storage, processing messages from queues, and monitoring storage usage.
Integrating Security in Azure Applications
Security is an integral part of cloud development. Azure developers must understand how to protect applications and data effectively.
Authentication and Authorization
Candidates should be proficient in:
Implementing Azure Active Directory for user authentication
Configuring role-based access control (RBAC)
Using OAuth and OpenID Connect for secure API access
Hands-on practice includes creating an application that authenticates users via Azure AD and enforces RBAC for different user roles.
Data Protection
Protecting data at rest and in transit is critical. Developers should know how to:
Encrypt sensitive data using Azure Key Vault
Implement TLS for secure communications
Manage secrets and certificates for applications
Exercises involve storing secrets in Key Vault, retrieving them securely in applications, and encrypting data before storage.
Threat Protection
Developers should be familiar with monitoring for threats and ensuring compliance:
Using Azure Security Center for security recommendations
Configuring alerts for suspicious activity
Following best practices for application security and compliance
Practical exercises include enabling Security Center on resources, monitoring for potential issues, and applying security recommendations.
Monitoring and Troubleshooting Applications
Azure provides a rich set of monitoring and diagnostic tools. Developers must know how to use these tools to maintain application health.
Azure Monitor
Azure Monitor collects telemetry data from applications and resources. Developers should understand:
Setting up metrics, logs, and alerts
Analyzing performance and identifying bottlenecks
Automating responses to critical alerts
Hands-on practice includes configuring monitoring for a web application and setting up automated notifications for performance thresholds.
Application Insights
Application Insights provides deep insights into application behavior. Skills include:
Tracking application requests, dependencies, and exceptions
Using telemetry to improve performance and reliability
Integrating insights into dashboards and reports
Exercises involve instrumenting an application with Application Insights and analyzing request failures or slow responses.
Troubleshooting Techniques
Effective troubleshooting requires a systematic approach:
Identifying the root cause of errors using logs and metrics
Isolating performance issues and optimizing code
Applying updates or patches to resolve recurring problems
Hands-on practice includes simulating application errors and using diagnostic tools to identify and fix issues.
Implementing DevOps Practices
DevOps practices are essential for modern cloud development. Azure developers should understand CI/CD, infrastructure automation, and version control.
Continuous Integration and Continuous Deployment
Developers should know how to:
Set up CI/CD pipelines using Azure DevOps or GitHub Actions
Automate builds, tests, and deployments
Manage environment configurations for development, testing, and production
Practical exercises include creating a pipeline that automatically deploys a web application to Azure App Service whenever code is committed.
Infrastructure as Code
Infrastructure as Code (IaC) enables consistent deployment of resources. Skills include:
Writing templates using ARM, Bicep, or Terraform
Automating resource provisioning and configuration
Version controlling infrastructure code for reproducibility
Exercises involve creating a template for deploying a storage account, app service, and database, and testing automated deployments.
Collaboration and Version Control
Developers should be proficient with Git and collaborative workflows:
Using branches and pull requests for feature development
Resolving merge conflicts and reviewing code
Integrating version control with deployment pipelines
Hands-on practice includes managing a team repository, implementing feature branches, and deploying updates via CI/CD.
Building Real-World Applications
Hands-on experience is critical for mastering Azure development. Candidates should practice integrating multiple Azure services into cohesive solutions. Examples of real-world exercises include:
Developing a serverless workflow that processes data from IoT devices and stores it in Cosmos DB
Creating a multi-tier web application with App Service, SQL Database, and Blob Storage
Implementing authentication, monitoring, and automated deployment for a web application
Integrating APIs and third-party services into an event-driven architecture
These exercises reinforce core skills, deepen understanding, and prepare candidates for real-world challenges.
Mastering the core skills and hands-on practices for Azure developers is essential for success in the Microsoft Certified: Azure Developer Associate program. By focusing on compute services, storage solutions, security integration, monitoring, troubleshooting, and DevOps practices, developers can build secure, scalable, and high-performing applications on Microsoft Azure.
Practical experience through labs, projects, and real-world exercises ensures that knowledge is not only theoretical but also applicable to real business scenarios. These skills not only help in passing the AZ-204 exam but also prepare developers for rewarding roles in cloud application development, DevOps, and solution architecture.
By dedicating time to hands-on learning and continuous practice, aspiring Azure developers can confidently advance their careers and become valuable contributors in the growing cloud ecosystem.
Real-World Applications and Career Opportunities for Azure Developers
Earning the Microsoft Certified: Azure Developer Associate certification opens doors to a variety of practical applications and career pathways. Azure developers are in high demand as organizations increasingly migrate workloads to the cloud and seek scalable, secure, and innovative solutions. Beyond certification, understanding how to apply Azure skills in real-world scenarios and exploring career opportunities is crucial for professional growth.
This guide explores the practical applications of Azure development skills, industry use cases, and the range of career options available to certified professionals.
Real-World Applications of Azure Development
Azure developers apply their skills across numerous domains, building solutions that improve business efficiency, enhance user experiences, and support organizational goals. These applications span multiple industries, including finance, healthcare, retail, government, and technology.
Web and Mobile Applications
One of the most common applications of Azure development is building web and mobile applications. Developers can leverage Azure App Service, Azure Functions, and Azure SQL Database to create scalable, high-performing applications.
Key considerations include:
Ensuring responsive and accessible design
Integrating authentication and authorization
Optimizing performance with caching and database indexing
Monitoring usage and application performance with Application Insights
Examples include e-commerce platforms, mobile banking apps, educational portals, and content management systems.
Serverless and Event-Driven Architectures
Azure Functions and Logic Apps allow developers to create serverless, event-driven solutions. These architectures reduce infrastructure management overhead and scale automatically based on demand.
Applications include:
Automated workflows for data processing
Event-based triggers for IoT devices
Scheduled tasks for reporting or notifications
Real-time data processing pipelines
Serverless solutions are cost-effective and highly scalable, making them ideal for startups, enterprise applications, and microservices architectures.
Cloud Databases and Data Solutions
Azure developers often work with cloud databases to manage and process structured and unstructured data. This involves using Azure SQL Database, Cosmos DB, and Blob Storage to implement solutions that support analytics, reporting, and operational needs.
Key practices include:
Designing database schemas for optimal performance
Implementing data replication and backup strategies
Integrating applications with storage and database services
Ensuring secure access to sensitive information
Real-world examples include inventory management systems, customer relationship management applications, and data-driven reporting tools.
Integration and API Development
Modern applications often rely on multiple services, APIs, and external systems. Azure developers design solutions that integrate these services efficiently and securely.
Applications include:
RESTful API development for internal and external use
Connecting on-premises systems with cloud services
Event-driven integrations using Event Grid, Service Bus, or Event Hubs
Consuming third-party APIs for additional functionality
Integration skills allow businesses to create cohesive systems that communicate seamlessly across platforms.
DevOps and Continuous Deployment
Azure developers often implement DevOps practices to ensure smooth deployment and continuous improvement. Using Azure DevOps or GitHub Actions, developers automate builds, tests, and deployments, enabling faster delivery and reducing errors.
Applications include:
CI/CD pipelines for web and mobile applications
Automated testing and validation of code changes
Infrastructure as code for consistent environment deployment
Monitoring and feedback loops to improve performance
Implementing DevOps ensures that applications remain robust, scalable, and easy to maintain over time.
Industry Use Cases for Azure Developers
Azure development skills are applicable across multiple industries. Organizations increasingly rely on Azure developers to implement solutions that drive business value.
Finance and Banking
Financial institutions leverage Azure to develop secure, scalable applications for online banking, payment processing, and data analytics. Developers create solutions that handle large transaction volumes while maintaining compliance and security standards.
Healthcare
In healthcare, Azure developers build applications that manage patient records, telemedicine platforms, and data analytics systems. Solutions must prioritize data privacy, comply with regulations such as HIPAA, and support high availability for critical services.
Retail and E-commerce
Retail organizations use Azure for e-commerce platforms, inventory management, and customer engagement solutions. Developers integrate cloud services to provide real-time inventory updates, personalized experiences, and seamless payment processing.
Government and Public Sector
Government agencies adopt Azure for secure data management, citizen services, and infrastructure modernization. Developers build solutions that are compliant, scalable, and capable of handling sensitive information efficiently.
Technology and Startups
Tech companies and startups leverage Azure to develop innovative applications, from SaaS products to AI-powered solutions. Azure developers play a key role in creating scalable, cost-effective applications that support rapid growth and deployment.
Career Opportunities for Azure Developers
The demand for Azure developers continues to grow as cloud adoption accelerates. Certification provides recognition of expertise and opens doors to a variety of roles in cloud development and related domains.
Azure Developer
Azure developers design, implement, and maintain cloud applications. Responsibilities include deploying compute solutions, managing storage, integrating services, and ensuring security. This role is ideal for those seeking hands-on cloud development experience.
Cloud Solutions Developer
Cloud solutions developers focus on creating integrated solutions that leverage multiple Azure services. They design scalable architectures, integrate APIs, and optimize performance across cloud environments.
DevOps Engineer
DevOps engineers implement CI/CD pipelines, automate deployments, and monitor applications for performance and reliability. Azure developers with DevOps expertise can contribute to faster delivery cycles and more robust application management.
Application Architect
Application architects design the overall structure of cloud applications. They select appropriate services, define integration patterns, ensure security compliance, and oversee deployment strategies. This role combines technical expertise with strategic planning.
Data Developer or Data Engineer
Data-focused developers build applications that process and analyze large datasets using Azure services. They work with SQL and NoSQL databases, implement ETL pipelines, and optimize data storage and retrieval.
Salary Expectations and Market Demand
Certified Azure developers command competitive salaries due to their specialized skills. Salaries vary by region, experience, and role, but generally, Azure-certified professionals earn higher than average compensation compared to non-certified peers.
Market demand for Azure developers continues to grow, driven by organizations’ migration to cloud infrastructure, the adoption of serverless architectures, and the need for scalable, secure applications. Professionals with hands-on Azure experience and certification are highly sought after across multiple industries.
Continuous Learning and Skill Expansion
Technology evolves rapidly, and Azure services are regularly updated with new features. Certified developers are encouraged to engage in continuous learning to maintain relevance and deepen expertise.
Opportunities for ongoing growth include:
Exploring advanced Azure certifications, such as Azure Solutions Architect Expert or Azure DevOps Engineer Expert
Specializing in AI, machine learning, or data analytics using Azure services
Contributing to open-source projects or cloud communities
Attending workshops, webinars, and conferences to stay updated on cloud trends
Continuous learning ensures that professionals can leverage the latest technologies to deliver innovative and efficient solutions.
Building a Professional Portfolio
Practical experience and demonstrable projects are crucial for career advancement. Candidates should build a portfolio that showcases their Azure development skills. Portfolio examples may include:
Web and mobile applications deployed on Azure
Serverless workflows and event-driven solutions
Database and storage integration projects
API integrations and third-party service connections
DevOps pipelines and infrastructure automation
A well-documented portfolio demonstrates competence and provides concrete evidence of skills to potential employers.
The Microsoft Certified: Azure Developer Associate certification equips professionals with the knowledge and skills to build real-world cloud applications. Certified developers apply their expertise across web and mobile development, serverless architectures, cloud databases, integration, and DevOps practices.
Career opportunities for Azure developers are abundant and span industries including finance, healthcare, retail, government, and technology startups. Certified professionals are recognized for their expertise, command competitive salaries, and contribute significantly to modern cloud solutions.
By continuously building hands-on experience, exploring advanced certifications, and maintaining an up-to-date skill set, Azure developers can maximize their impact and advance in a rewarding and dynamic field. Mastering Azure development not only enables career growth but also empowers professionals to create innovative, secure, and scalable solutions that drive business success.
Advanced Learning, Continuous Growth, and Certification Benefits for Azure Developers
Earning the Microsoft Certified: Azure Developer Associate certification is an important milestone in a developer’s career, but it is only the beginning of a continuous journey toward expertise in cloud computing. Azure is a rapidly evolving platform, and staying ahead requires ongoing learning, hands-on practice, and leveraging the benefits of certification to enhance professional growth.
This guide explores advanced learning opportunities, strategies for continuous skill development, and the long-term benefits of being an Azure-certified developer.
The Importance of Continuous Learning in Azure
Cloud technologies are dynamic, and Microsoft frequently updates Azure services with new features, improvements, and integrations. Developers who maintain an ongoing learning strategy can leverage these updates to create more efficient, scalable, and innovative applications.
Continuous learning is crucial because it allows developers to:
Stay current with new Azure services and best practices
Enhance problem-solving skills for complex cloud scenarios
Improve career prospects and remain competitive in the job market
Contribute to more efficient, secure, and optimized cloud solutions
Professionals who actively engage in learning maintain their value in an ever-changing technology landscape and position themselves as leaders in cloud development.
Advanced Azure Certifications
After earning the Azure Developer Associate credential, professionals can pursue advanced certifications to expand their knowledge and specialization. Advanced certifications help developers gain expertise in architecture, DevOps, AI, and data solutions.
Azure Solutions Architect Expert
This certification validates the ability to design and implement complex cloud solutions. Developers learn to:
Design scalable and secure architecture using Azure services
Optimize applications for cost, performance, and reliability
Implement governance and compliance strategies
Integrate multiple Azure services for enterprise-grade solutions
Azure DevOps Engineer Expert
Focusing on DevOps practices, this certification teaches professionals how to:
Implement CI/CD pipelines using Azure DevOps or GitHub Actions
Manage infrastructure as code for consistent deployments
Monitor applications and automate responses to issues
Integrate security practices into development and deployment
Azure AI Engineer Associate
For developers interested in artificial intelligence, this certification enables skills in:
Building AI solutions using Azure Cognitive Services
Implementing machine learning models on Azure Machine Learning
Integrating AI capabilities into applications
Optimizing AI models for performance and cost efficiency
Azure Data Engineer Associate
This certification focuses on data management and analytics:
Designing and implementing data storage and processing solutions
Integrating data from multiple sources
Ensuring data security and compliance
Building pipelines for analytics and machine learning
Pursuing advanced certifications demonstrates commitment to professional growth and provides a clear path for career advancement.
Hands-On Practice and Real-World Projects
Practical experience is essential for mastering Azure development. Developers should continuously engage in hands-on projects to reinforce skills and explore new services. Practical exercises can include:
Building complex applications that integrate multiple Azure services
Implementing serverless solutions for event-driven workflows
Designing scalable databases with replication and high availability
Creating CI/CD pipelines for automated deployments
Monitoring applications using Azure Monitor and Application Insights
Engaging in real-world projects ensures that knowledge is applied effectively and provides evidence of competence for employers and clients.
Leveraging Community and Professional Networks
Active participation in professional communities enhances learning and career growth. Azure developers can benefit from:
Microsoft Tech Community forums for discussions, updates, and tips
LinkedIn groups and social networks for networking and sharing experiences
Local or virtual meetups, webinars, and workshops for practical learning
Open-source contributions to showcase skills and collaborate with other developers
Networking provides insights into industry trends, access to mentorship, and opportunities for professional collaboration.
Online Learning Resources
A variety of online resources support continuous learning and skill enhancement:
Microsoft Learn offers structured modules and learning paths tailored to specific Azure skills
Pluralsight and Udemy provide courses on advanced Azure topics and hands-on labs
YouTube tutorials and webinars demonstrate real-world use cases and practical applications
GitHub repositories with sample projects allow developers to explore and experiment with code
Using multiple resources ensures comprehensive learning and exposure to different perspectives and techniques.
Staying Updated with Azure Services
Microsoft regularly introduces new features, updates, and services in Azure. Staying informed allows developers to leverage these changes to improve applications and solutions. Strategies include:
Following Azure blogs, newsletters, and official announcements
Reviewing documentation for new services and updates
Participating in beta programs or early access previews
Experimenting with new features in test environments
Staying current ensures developers can design solutions using the latest technologies and best practices.
Certification Benefits Beyond Skill Validation
While certification validates technical knowledge, it also provides broader professional advantages:
Career Advancement
Certified Azure developers are often considered for advanced roles, including lead developer, cloud architect, and DevOps engineer. Certification demonstrates a commitment to professional growth and a verified skill set.
Industry Recognition
Microsoft certification is globally recognized and respected. Employers and clients view certified professionals as credible and capable of delivering high-quality cloud solutions.
Higher Earning Potential
Certification often leads to better salary opportunities. Organizations are willing to invest in professionals who possess verified cloud expertise and practical skills.
Access to Microsoft Resources
Certified professionals gain access to exclusive Microsoft resources, such as Azure credits, training events, and professional networks. These resources support continuous learning and professional development.
Confidence in Problem Solving
Certification provides confidence in tackling complex cloud development challenges. Developers can apply best practices, optimize solutions, and address issues with assurance and competence.
Strategies for Long-Term Growth
To maximize the benefits of Azure certification, developers should adopt a long-term growth strategy:
Continuously pursue advanced certifications and specializations
Build a portfolio showcasing projects and real-world applications
Participate in communities and network with other professionals
Experiment with new Azure services and explore innovative solutions
Seek mentorship or provide mentorship to reinforce learning
Long-term growth ensures sustained career advancement and positions developers as experts in cloud technology.
Emerging Trends for Azure Developers
Azure developers can benefit from understanding emerging trends in cloud technology:
Serverless computing is gaining adoption for scalable and cost-efficient applications
AI and machine learning integration is becoming critical for data-driven applications
Multi-cloud and hybrid cloud solutions require developers to design flexible architectures
Edge computing brings processing closer to data sources, enhancing performance
Security-first development practices are essential as cloud adoption expands
Being aware of these trends allows developers to stay ahead of the curve and adapt to industry demands.
Building a Continuous Learning Mindset
Professional growth in Azure development relies on adopting a continuous learning mindset. This mindset involves:
Embracing challenges as opportunities to learn
Seeking feedback and reflecting on experiences
Setting personal learning goals and tracking progress
Experimenting with new technologies and approaches
Staying curious and proactive in skill development
A continuous learning mindset ensures that Azure developers remain adaptable, skilled, and ready for evolving technology landscapes.
Conclusion
The journey of an Azure developer extends far beyond earning the Microsoft Certified: Azure Developer Associate certification. Advanced learning, hands-on practice, engagement with professional communities, and staying updated with Azure services are essential for continuous growth.
Certification provides recognition, credibility, and career opportunities, but ongoing skill development ensures sustained success in the dynamic cloud ecosystem. By embracing advanced certifications, exploring real-world projects, leveraging networking opportunities, and cultivating a continuous learning mindset, Azure developers can achieve professional excellence and drive innovation in their organizations.
Investing in continuous learning not only enhances technical expertise but also opens doors to leadership roles, higher earning potential, and greater influence in the cloud development landscape. The combination of certification and ongoing growth equips developers to tackle the challenges of modern cloud computing and create impactful solutions that transform businesses.
ExamCollection provides the complete prep materials in vce files format which include Microsoft Certified: Azure Developer Associate certification exam dumps, practice test questions and answers, video training course and study guide which help the exam candidates to pass the exams quickly. Fast updates to Microsoft Certified: Azure Developer Associate certification exam dumps, practice test questions and accurate answers vce verified by industry experts are taken from the latest pool of questions.
Microsoft Microsoft Certified: Azure Developer Associate Video Courses

Top Microsoft Certification Exams
- AZ-104
- DP-700
- AI-102
- AI-900
- AZ-305
- MD-102
- PL-300
- AZ-500
- AZ-900
- SC-300
- SC-200
- MS-102
- AZ-204
- DP-600
- SC-401
- SC-100
- AZ-700
- PL-200
- AZ-400
- AZ-800
- SC-900
- PL-400
- AZ-140
- PL-600
- MS-900
- AZ-801
- DP-300
- MS-700
- MB-280
- PL-900
- GH-300
- MB-800
- MB-330
- MB-310
- DP-100
- DP-900
- MB-820
- MB-230
- MS-721
- GH-200
- PL-500
- MB-700
- MB-920
- GH-900
- MB-910
- MB-500
- MB-335
- MB-240
- GH-500
- DP-420
- AZ-120
- GH-100
- SC-400
- DP-203
- AZ-303
- MB-210
- 98-388
- MB-900
- 62-193
- 98-383
- MO-100
Site Search:


